
How to Set GA4 Events in Google Tag Manager: A Step-by-Step Guide
Reading Time: ~3 Mins | Written By: Felix Chen
To understand how visitors interact with your content, tracking how they interact with your website is a must. Custom event tracking can be set up using Google Analytics 4 (GA4) and Google Tag Manager (GTM). The process of setting up GA4 events with Google Tag Manager will be covered in this step-by-step guide.

GA4 Events: What Are They?
GA4 events are specific actions users take on your website, such as clicking on links, submitting forms, or page views. These activities can be monitored in Google Tag Manager and GA4 can take it one step further by dissecting this data.
Prerequisites: What You Need Before Getting Started
Before you start setting up GA4 events with Google Tag Manager, there are a few things you'll need:
1. A Google Analytics 4 (GA4) Property
Go to Google Analytics and follow the steps to create a new property. It’s essential for tracking user behaviour on your website.
2. A Google Tag Manager (GTM) Account and Container
Visit Google Tag Manager to set up an account.
Once you’ve set up your GTM account, create a container for your website. The container is like a toolbox that holds everything you need: tags, triggers, and settings, to track user actions and send data to Google Analytics.
3. GTM Code Installed on Your Website
For GTM to function properly, you need to install the GTM container code on your website. This code, and instructions, are provided by GTM when you create the container.
4. GA4 Configuration Tag in GTM
This tag links your website to your GA4 property and makes sure that data is sent correctly to your GA4 account.
Step 1: Log in to Google Tag Manager (GTM)
Log in to Google Tag Manager and sign in.
Select the container that corresponds to your website.
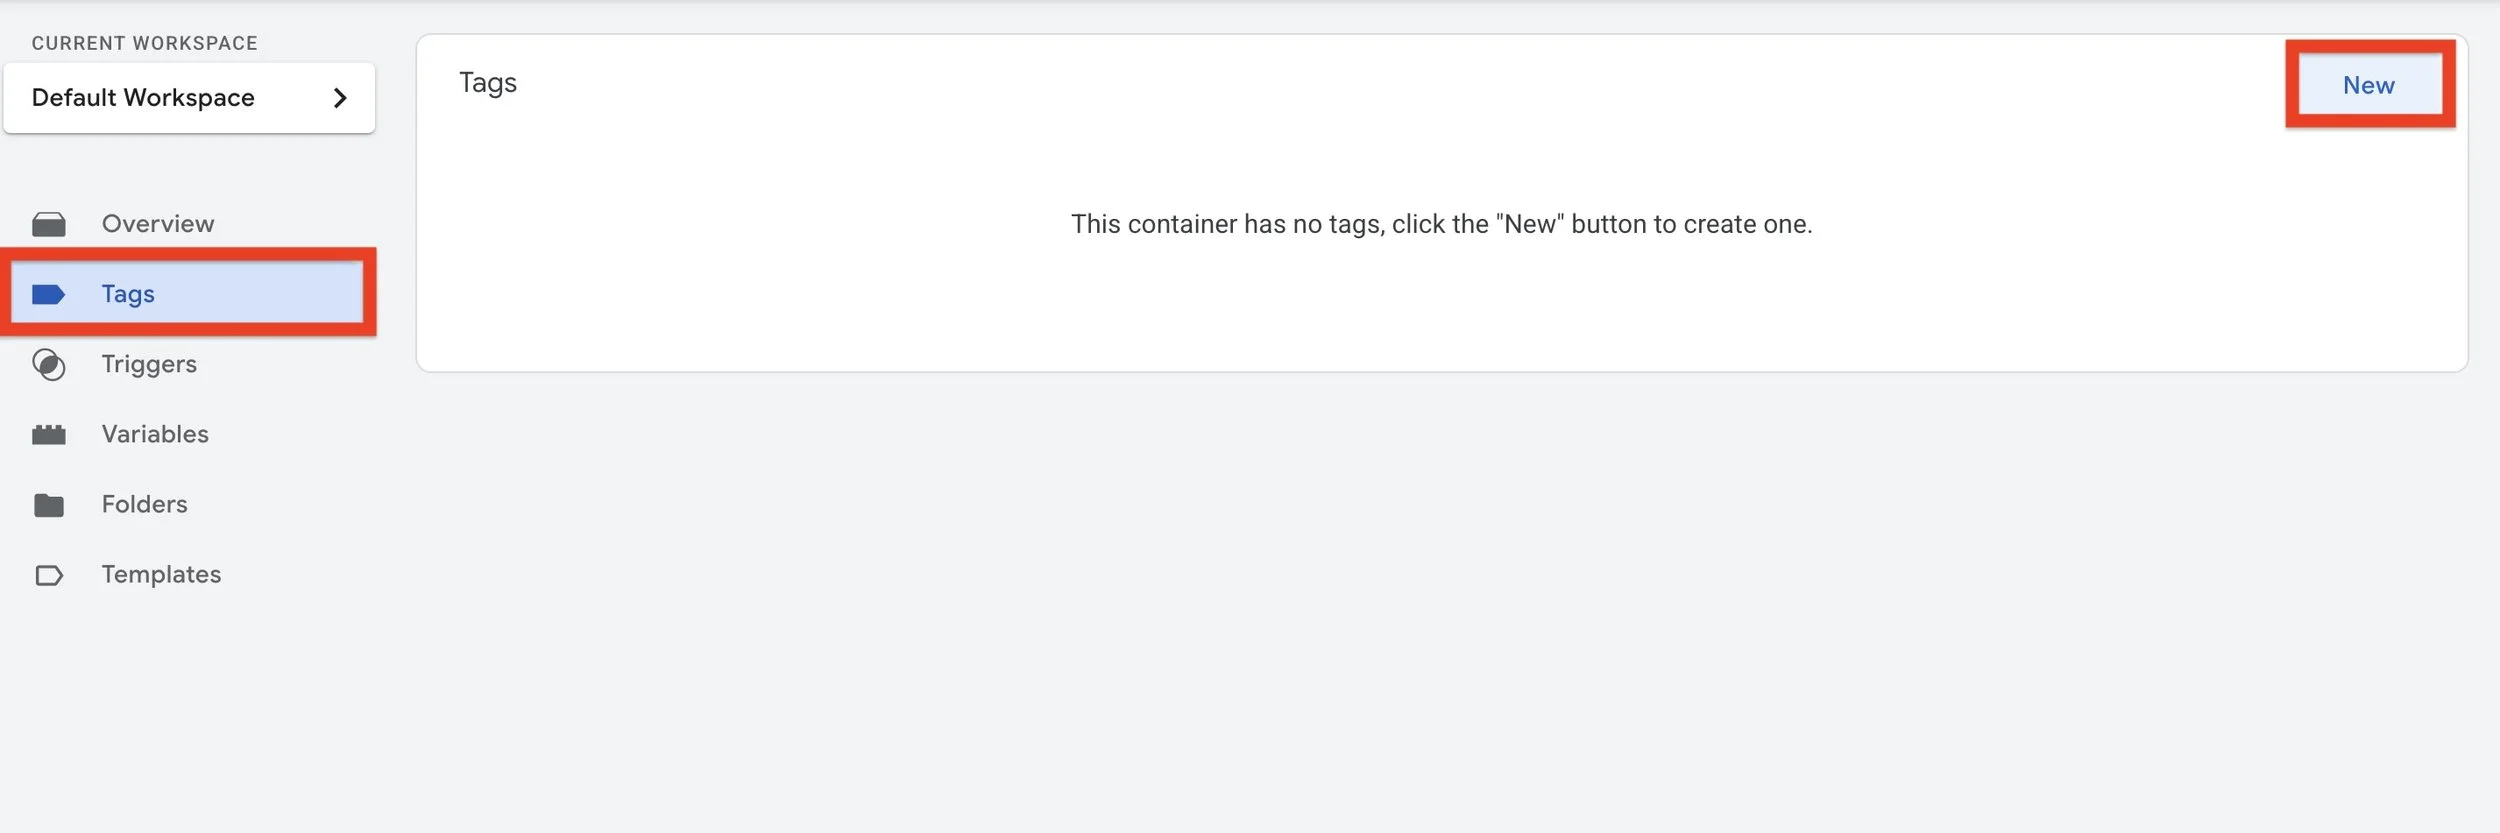
From the left sidebar, click “Tags”, then “New” to create a new tag.
Step 2: Creating a GA4 Event Tag
Click “Tag Configuration” and choose “Google Analytics".
Select your GA4 Configuration Tag under “Configuration Tag”.
Give the action you're tracking a name in the “Event Name" field, for example:
button_click
form_submission
video_played

Step 3: Set Up Triggers for the Event
Click on ‘Triggering’
Select "Triggering" to specify when the event should fire.
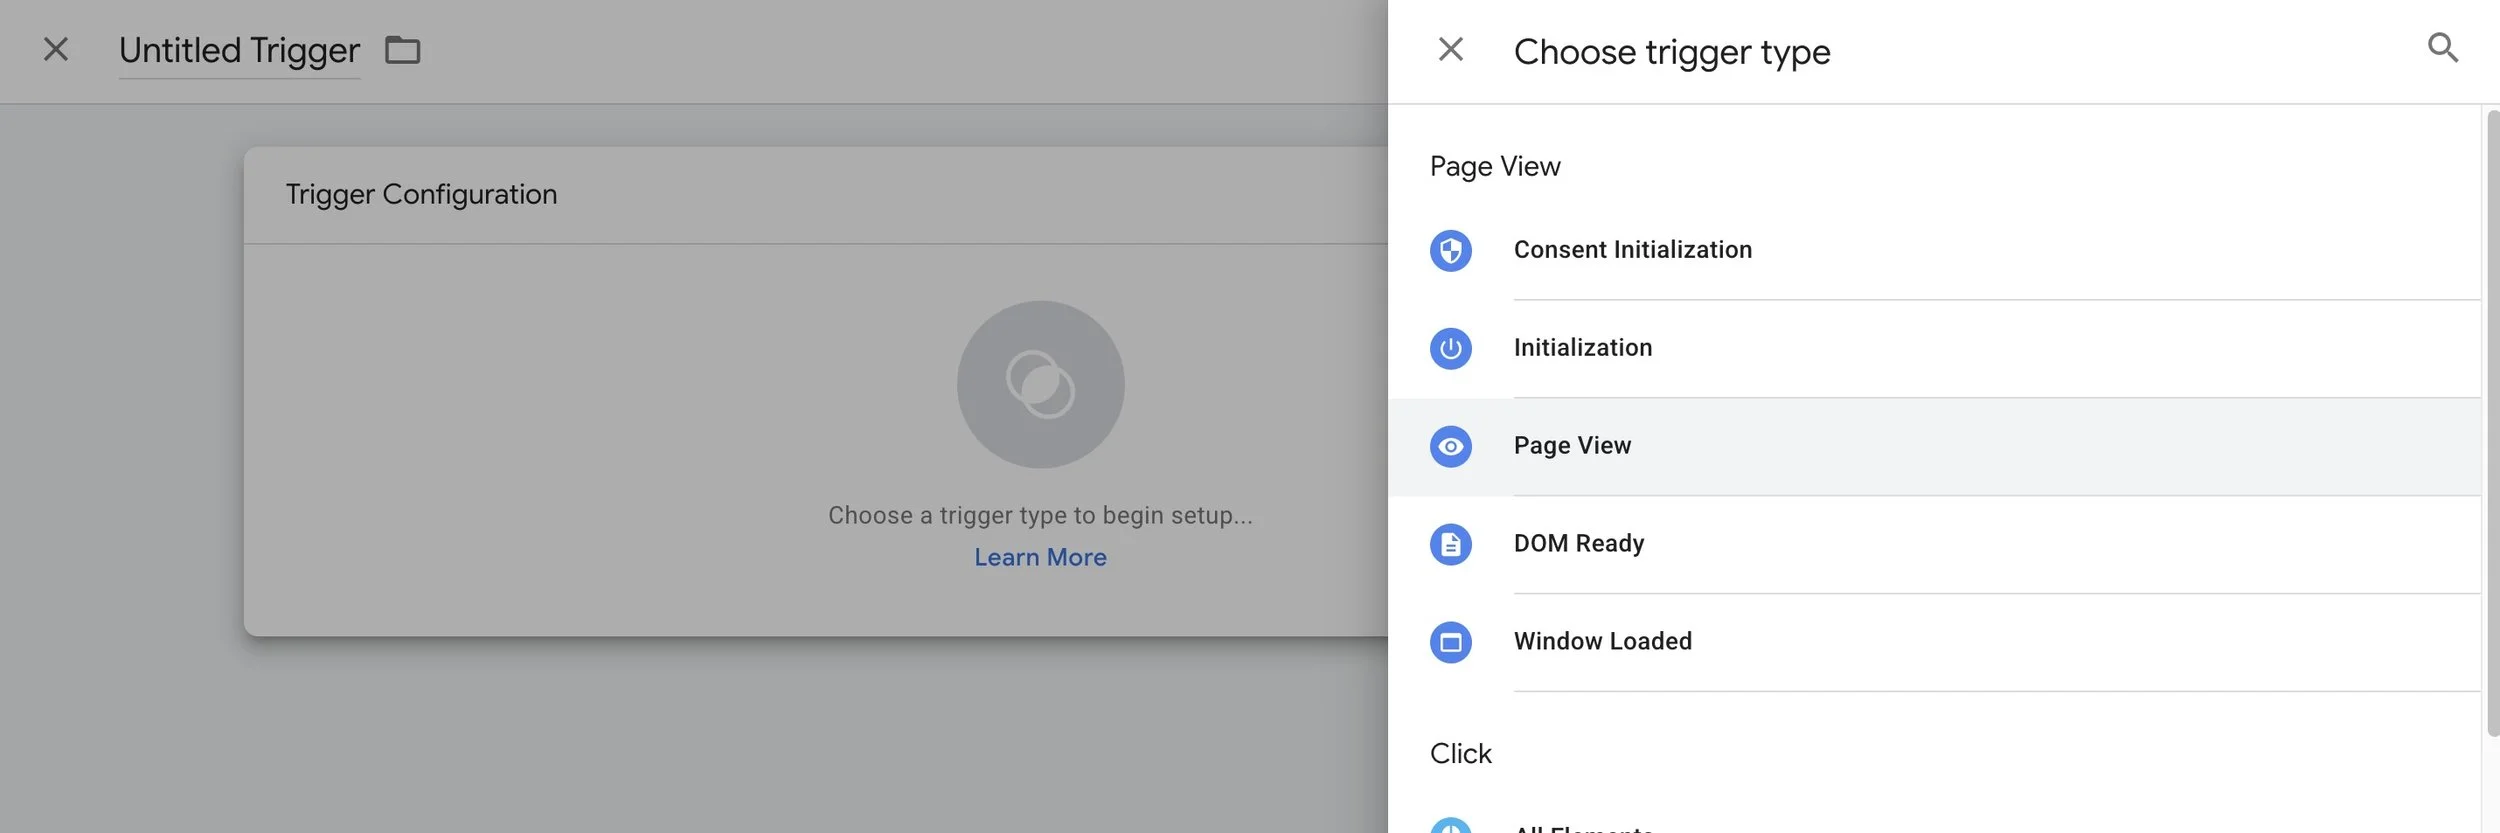
Choose a Trigger Type
Common triggers include:
Click Trigger: Tracks clicks on buttons, links, or other clickable elements.
Form Submission Trigger: Tracks when a form is submitted.
Page View Trigger: Tracks when a page is viewed.
YouTube Video Trigger: Tracks when a video is played, paused, or finished.
Configure Trigger Conditions
For example, if you’re tracking a button click:
Choose “Click URL” or “Click Classes” and specify the button/link you want to track.
Tip: If you’re tracking a form submission, set the trigger to fire when a form is successfully submitted.
Step 4: Test Your GA4 Event Tag
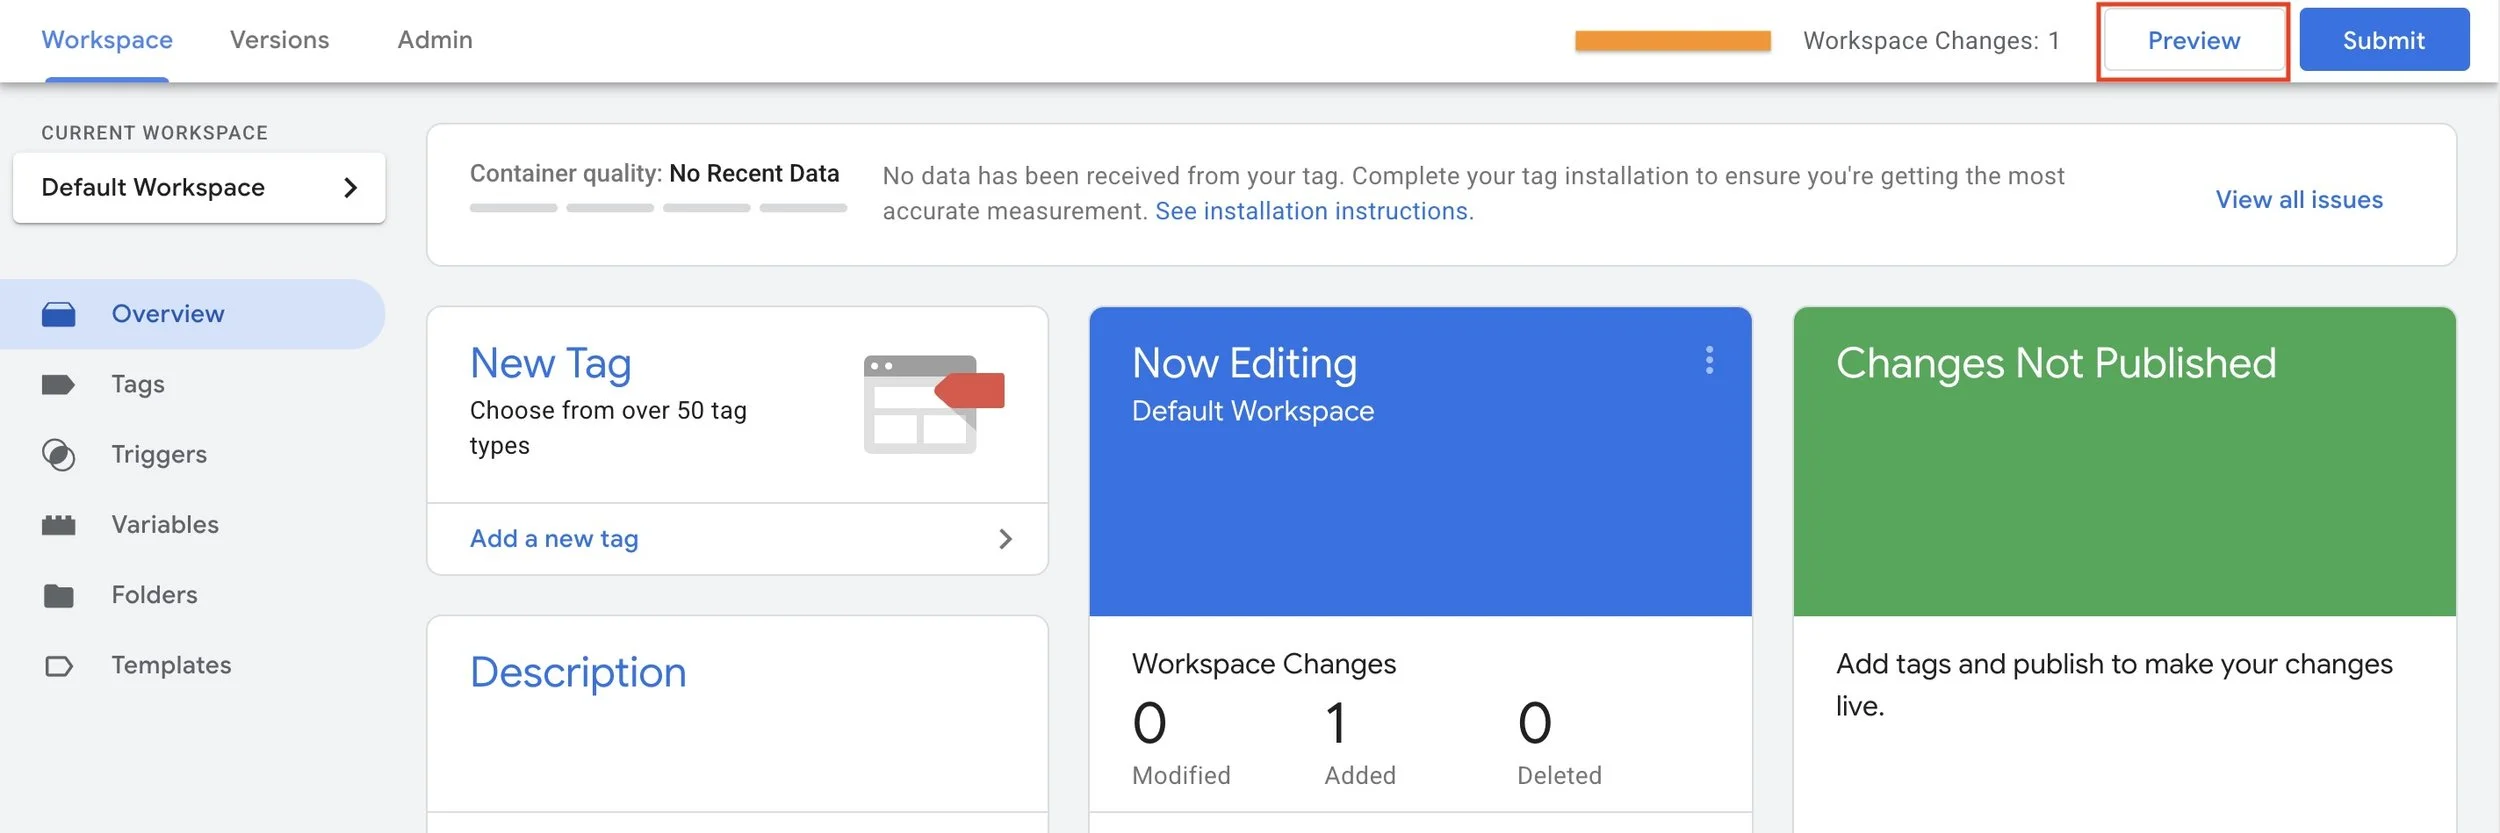
Use GTM Preview Mode
Simply click Preview in GTM.
This lets you see if your tag is firing correctly before you publish it.
Perform the Event Action on Your Website
Visit your website and trigger the action being tracked.
If the tag fires correctly, it will be displayed in the preview.
Step 5: Publish Your Changes
After you’ve checked your tags are working correctly, it’s time to publish them:
You simply click "Submit" in GTM and your GA4 event tracking is now live!
Conclusion
You can track most interactions on your website by following these four easy steps. With GTM and GA4, collecting data is made simple. These data points can help you improve the functionality of your website and also identify bottlenecks. Whether you're tracking button clicks, form submissions, or custom events, identifying these key data points will help you in making informed decisions.