
Getting Started with Mailchimp: How To Set Up an Account & Upload Your First Audience
Reading Time: ~4 Mins | Written By: Juliana Bermudez
Mailchimp Overview
Mailchimp's features and integrations allow you to create great-looking marketing campaigns. Mailchimp is also an all-in-one marketing platform that helps you manage and talk to your clients, customers, etc; through many different means of communication, not just email.
Mailchimp also offers a number of online resources to provide help and insights about its tools and features. Check out the guides and tutorials if you want to learn how something works, or if you run into any trouble.
All accounts start on Mailchimp’s Free plan, so you don't need a credit card to sign up. You can choose to purchase add-ons or upgrade to a paid plan later on once you become more familiar with the platform.

Signing Up For An Account
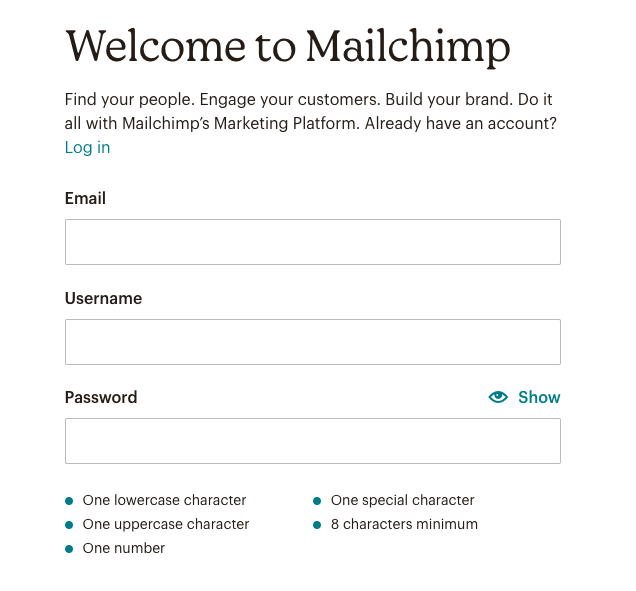
Step 1: Navigate to Mailchimp's signup page.
Step 2: Type in your Email and Password, then click Sign Up.
Step 3: Mailchimp will display a confirmation message. Check your inbox for the account activation email to complete your account setup.
Step 4: Open the account activation email, then click “Activate Account”.
Step 5: After activating you account via the account activation email, sign into your new Mailchimp account. Mailchimp will first take you to a page where you will be asked to provide required information about your business - fill out these areas. (This information is used to help make sure your account is compliant with Mailchimp’s Terms of Use and to provide guidance that is relevant to you and your company's needs)
Step 6: After you type in the required business information, follow the prompts to finish the activation process and get started in your new Mailchimp account.
Setting Up Your Audience by Importing Your List
Part One: Preparing for import
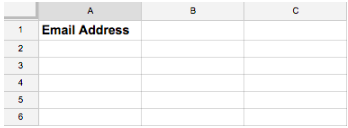
Step 1: In your spreadsheet program, Microsoft Excel or Google Sheets for example, open your blank worksheet.
Step 2: Create and label a column for Email Address. This is the only field Mailchimp will require for import, but you can add more, as noted below.
Step 3: Next to your Email Address column, create and label additional columns for First Name, Last Name, and any other information you want to import to Mailchimp.

Step 4: Paste your contacts' information into the relevant fields in the spreadsheet.

Step 5: Save the file in CSV format. This option can usually be accessed from the File menu in your spreadsheet program, labeled as "Export as .CSV" or "Download as .CSV".
Part Two: Import your file into Mailchimp
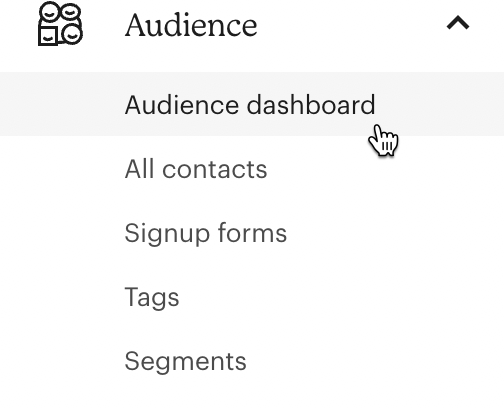
Step 1: Click “Audience” in your Mailchimp dashboard on the left side of the browser to open the panel. Then click “Audience dashboard.”
Step 2: If you have more than one audience, click the Current audience drop-down and choose the one you want to work with.
Step 3: Click the Manage Audience drop-down and choose Import contacts.
Step 4: Choose Upload a file.

Step 5: Click “Continue to Upload”. Then click “Browse” and choose the CSV file you created in Part 1 from your computer. Then click “Continue to Organize”.
Step 6: Use the Select an audience drop-down to confirm the audience you want to import to.

Step 7: Use the Select a status drop-down to choose the status of the contacts you're about to import

Step 8: Click “Continue to Tag”. If you want to assign tags to all of the contacts in your import, click the drop-down menu and choose or create tags as needed. You can also choose from popular tags.

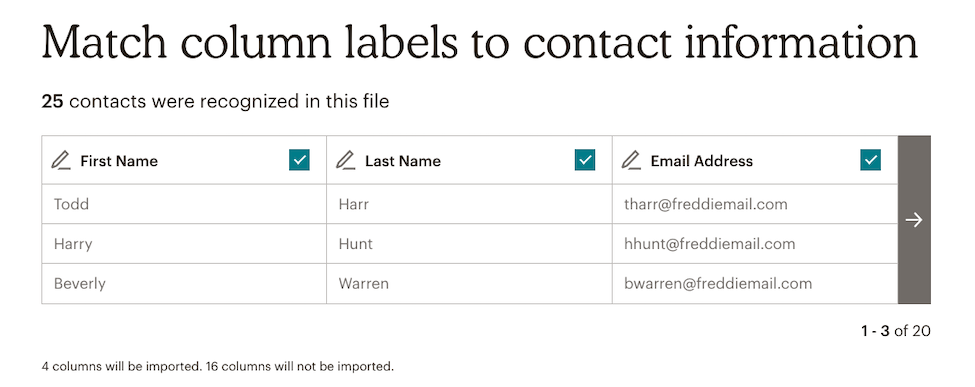
Step 9: When you're ready, click “Continue To Match”. Match the columns in your import file to the fields in your Mailchimp audience. Mailchimp automatically matches some columns for you. For example, the column that contains email addresses will match the required Email Address field.
Step 10: Click “Finalize Import” to review your import settings. If everything looks good, click “Complete Import”.